Project Introduction
Project document - sections.
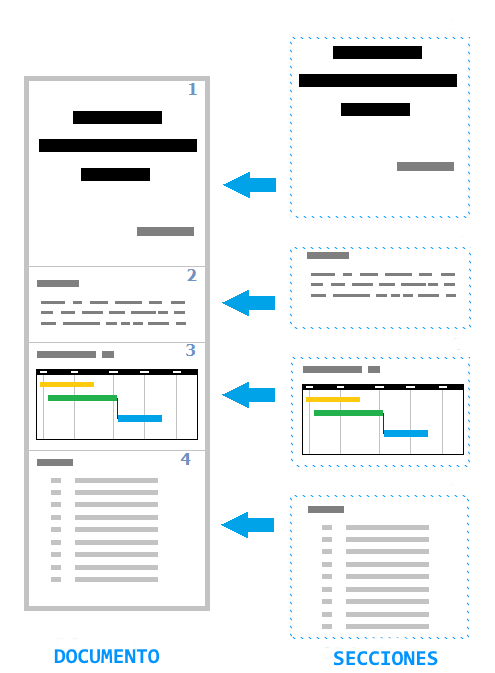
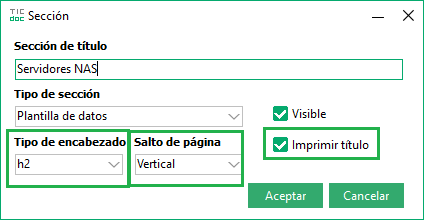
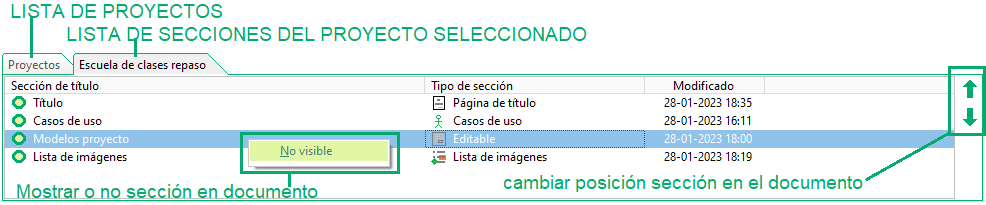
TICdoc generates a project document (memory), from a series of sections of different types (editable sections, table of contents, functional requirements, Gantt charts, etc). In the project editor, we have two tabs below: one with the list of projects and the other with the list of sections that make up the selected project. When a section is created, a title is indicated and if we want it to be included in the document or not, the type of header (h2 .. h5) that is used to format it (from project options), and if we want the section to make a page break (portrait or landscape). We can activate or deactivate sections to show them or not in the document, as well as change their position in it. The use of accesses can help in editing the document by keyboard to some of the actions (shortcuts TICdoc)
We can activate or deactivate sections to show them or not in the document, as well as change their position in it.
There are several types of sections (in the Project menu -> Sections each of them is detailed):
- editable: we can add text, images, tables, formulas, PlantUML diagrams, etc. The text base is HTML, so we can assign styles to format it. There are predefined styles for basic tags (h2,p,etc..)
- the content is generated with its own editor. Sections such as the bibliography, the glossary, the Gantt chart, etc. generate the content from the definition we make of it in its corresponding editor.
- the content is automatically generated from the rest of the sections. Examples of these sections are the table of contents, images and tables.
Project styles.
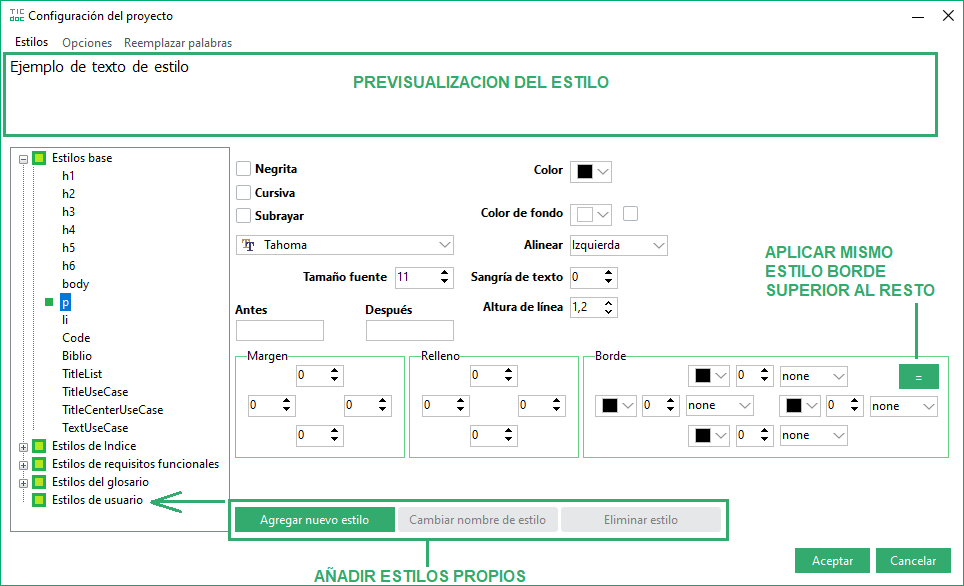
The content of each one of the sections of the project is stored as html, therefore the presentation is made according to some predefined styles that we can modify, and some own styles that we can
add and apply to different text elements. These styles can be edited from project options  .
.
Project document - headers and footers.
From project settings we can configure the display of a header and/or footer in printing. We find it in the Project Configuration Options tab
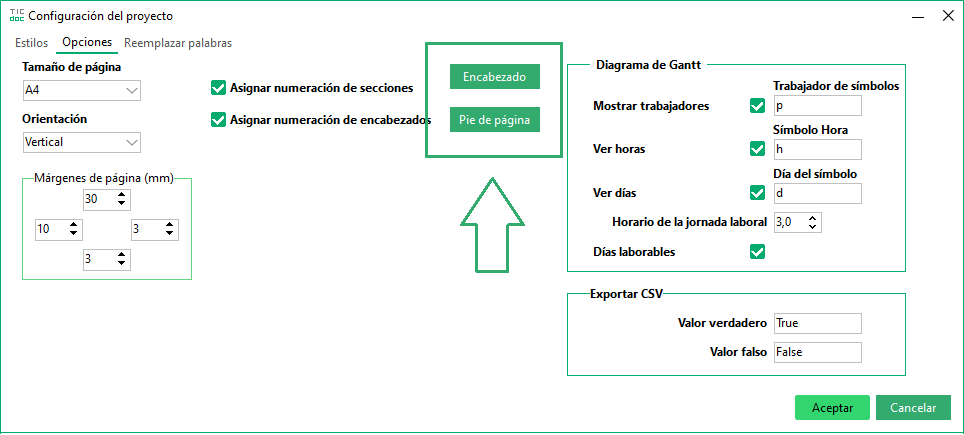
In both the header and the footer we open the same editor with the same options: make it visible or not, the width (in percentage), the height (in millimeters), background color, bottom line (header), or bottom line (foot). Then we add the elements that we want to show: document title, author, pages (with different display options), an image (select file) or free text (indicate it on this screen). We place these data in the position we want, we indicate the width (percentage) that they occupy and the format (color, font, etc). In the case of an image, we select it and indicate the width and height it occupies in millimeters.
